
Guide 2: Connect Notion
Last updated 15 July 2026
Part of the Starter Kit. About 5 minutes.
This is the step that gives Claude a memory of its own - somewhere it can write things down and find them again next conversation, so you never have to carry context between chats yourself.
The memory lives in Notion: a free notes app, in your account. You can read everything Claude writes there, always. And here's the nice part: after this guide's five minutes of connecting, you never have to touch Notion again unless you want to read it - Claude builds and maintains its own pages.
Which Notion account?
If you don't use Notion already: sign up free at notion.com and skip this bit.
If you do use Notion already, one honest thing before connecting: Claude connects with your access level - it can reach what you can reach in the workspace you connect, and it acts on your behalf within that. In practice the kit only ever has it work inside its own memory pages, and everything it does is visible. But if you'd rather have a hard wall between Claude and your existing Notion life, there's a free option: make a second Notion account just for this (a different email address is all it takes). Claude gets a workspace of its own; your existing one stays untouched. Either choice is fine - it's about what lets you relax.
Connect the accounts
-
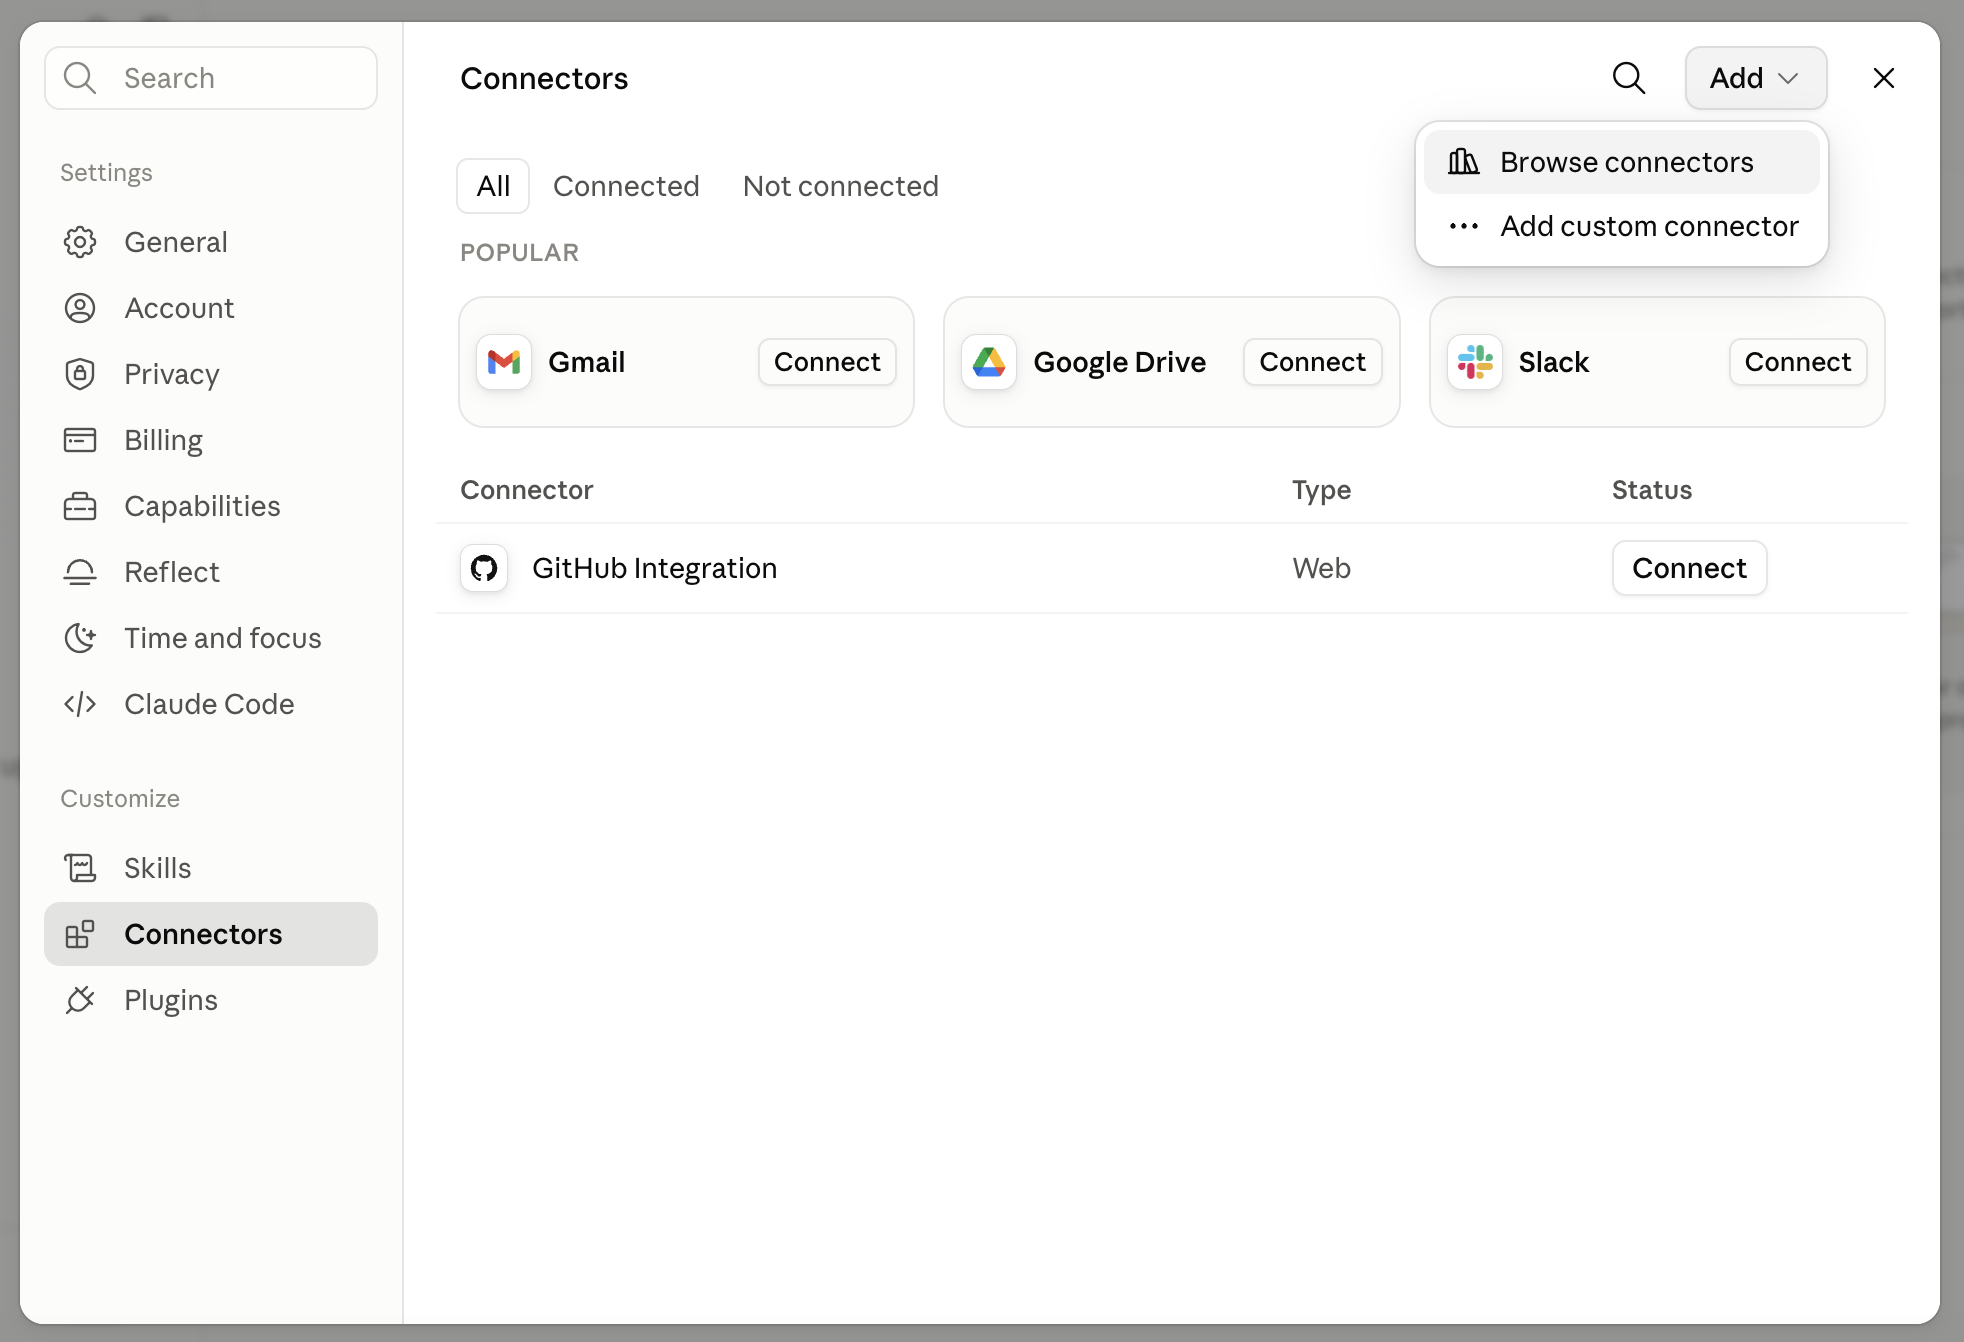
In Claude, click your name (bottom-left) and open Settings, then Connectors.
-
Don't be thrown by the "Popular" row - that's Gmail, Google Drive and Slack, and Notion isn't in it. Instead click Add (top right), then Browse connectors.
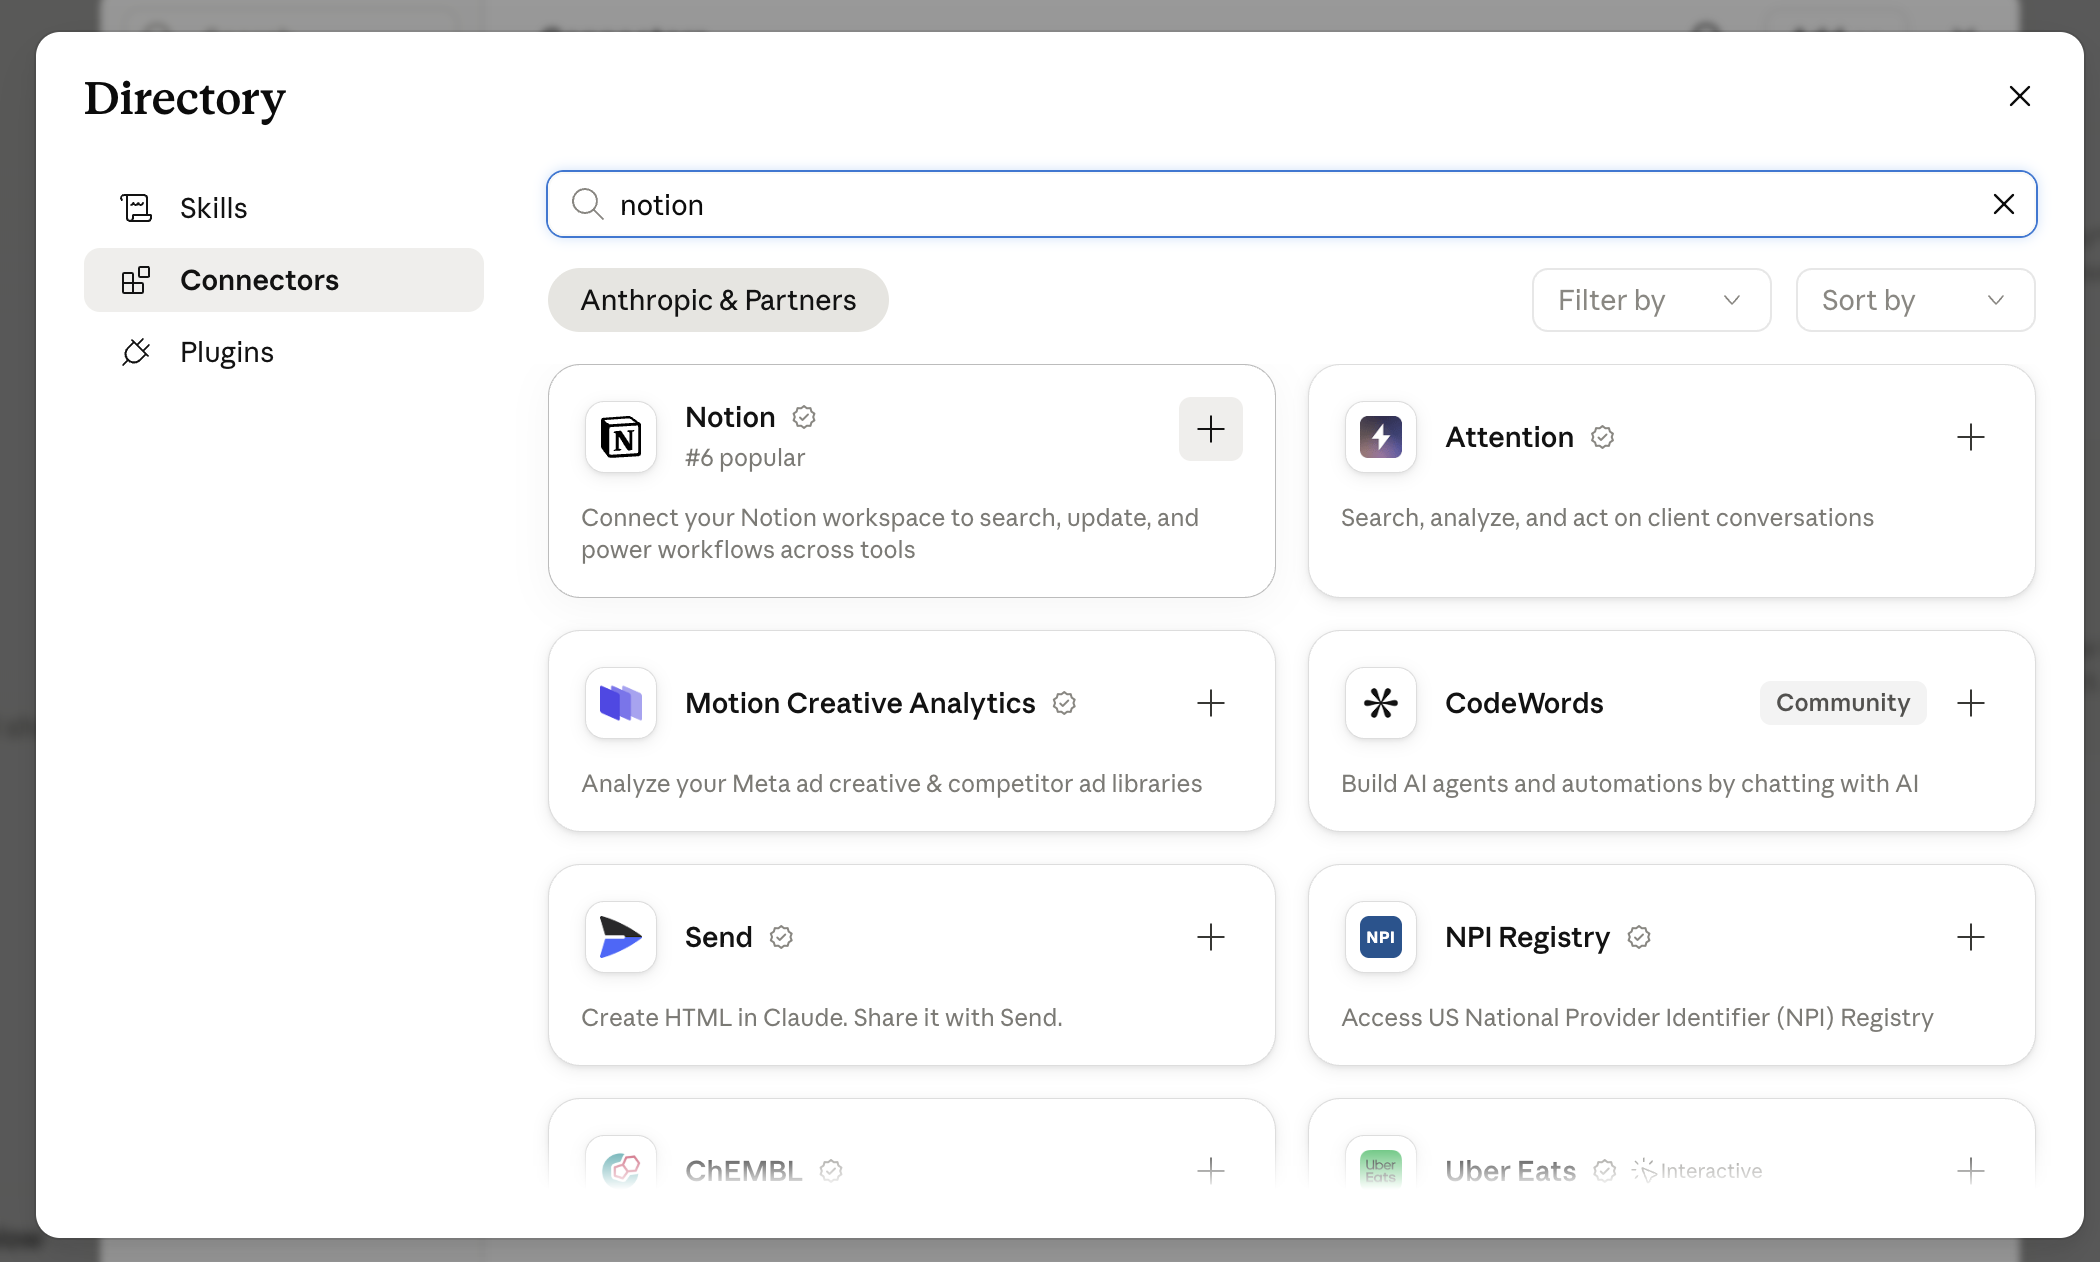
- A Directory opens. Search for notion, and click the + on the Notion card ("Connect your Notion workspace to search, update, and power workflows across tools").
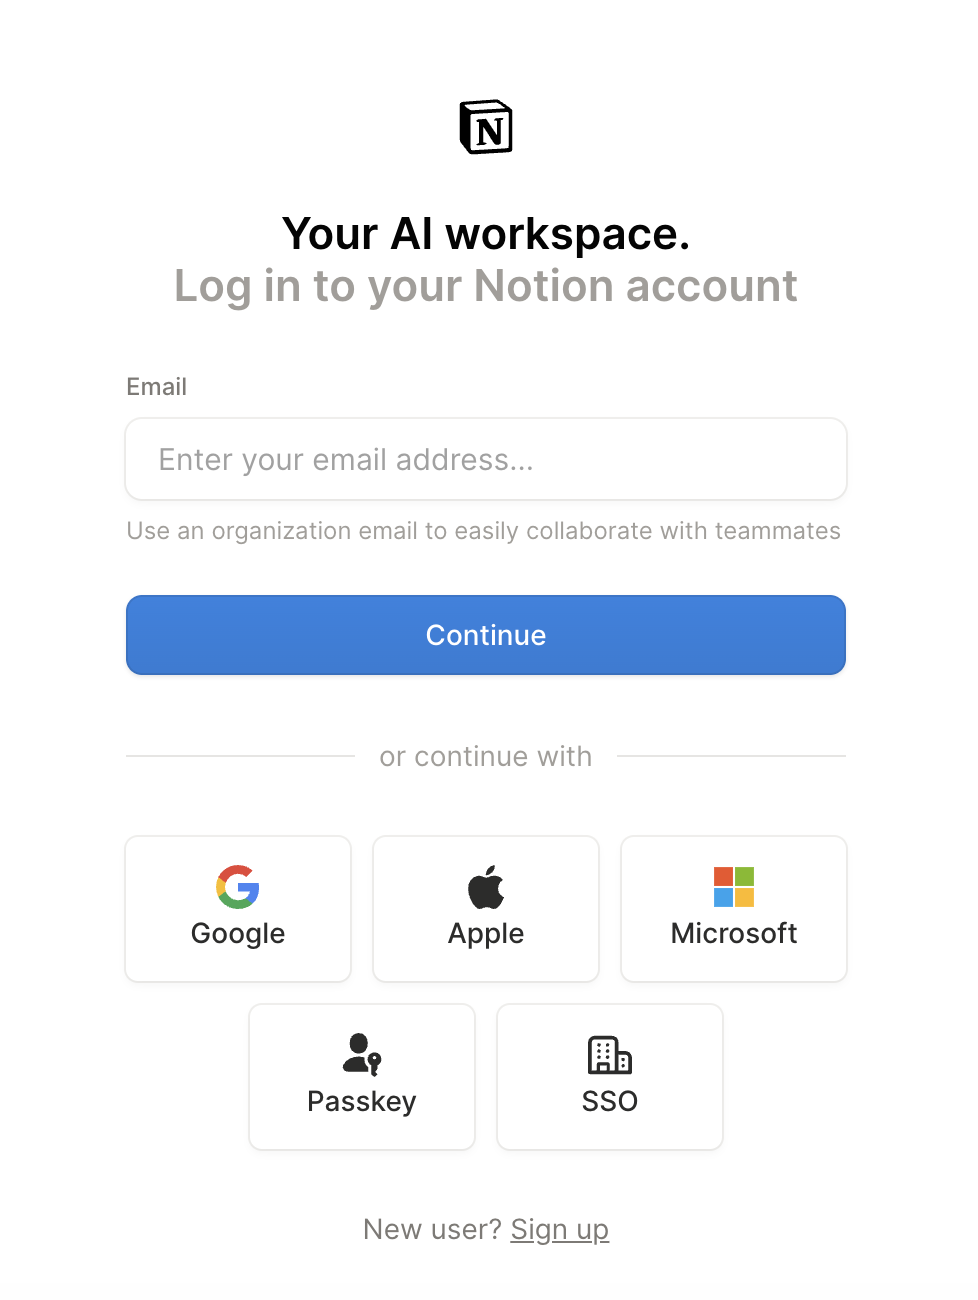
- Notion asks you to log in (the "Your AI workspace" screen). Log in - or if you're brand new, Sign up works from right here.
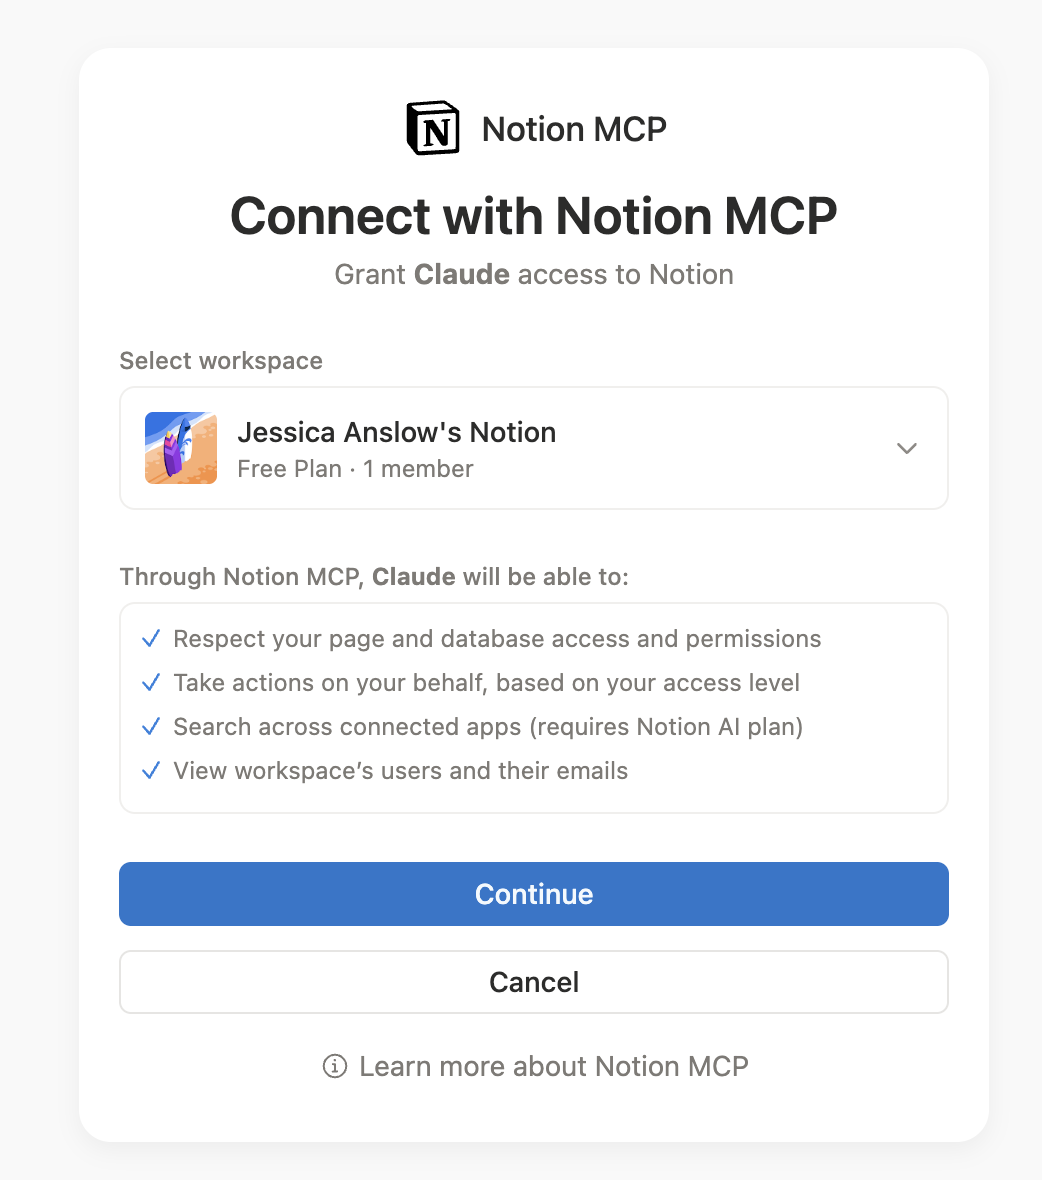
- Next, usually, an approval screen: "Connect with Notion MCP - Grant Claude access to Notion." Check the workspace shown is the one you want, and press Continue. Some accounts skip this screen entirely and bounce you straight back to Claude - that's normal too, nothing's gone wrong.
- You'll land back where you were in Claude - on your project page, not in settings - which can feel like nothing happened. To see it worked: reopen Settings → Connectors. Notion now shows a tick.
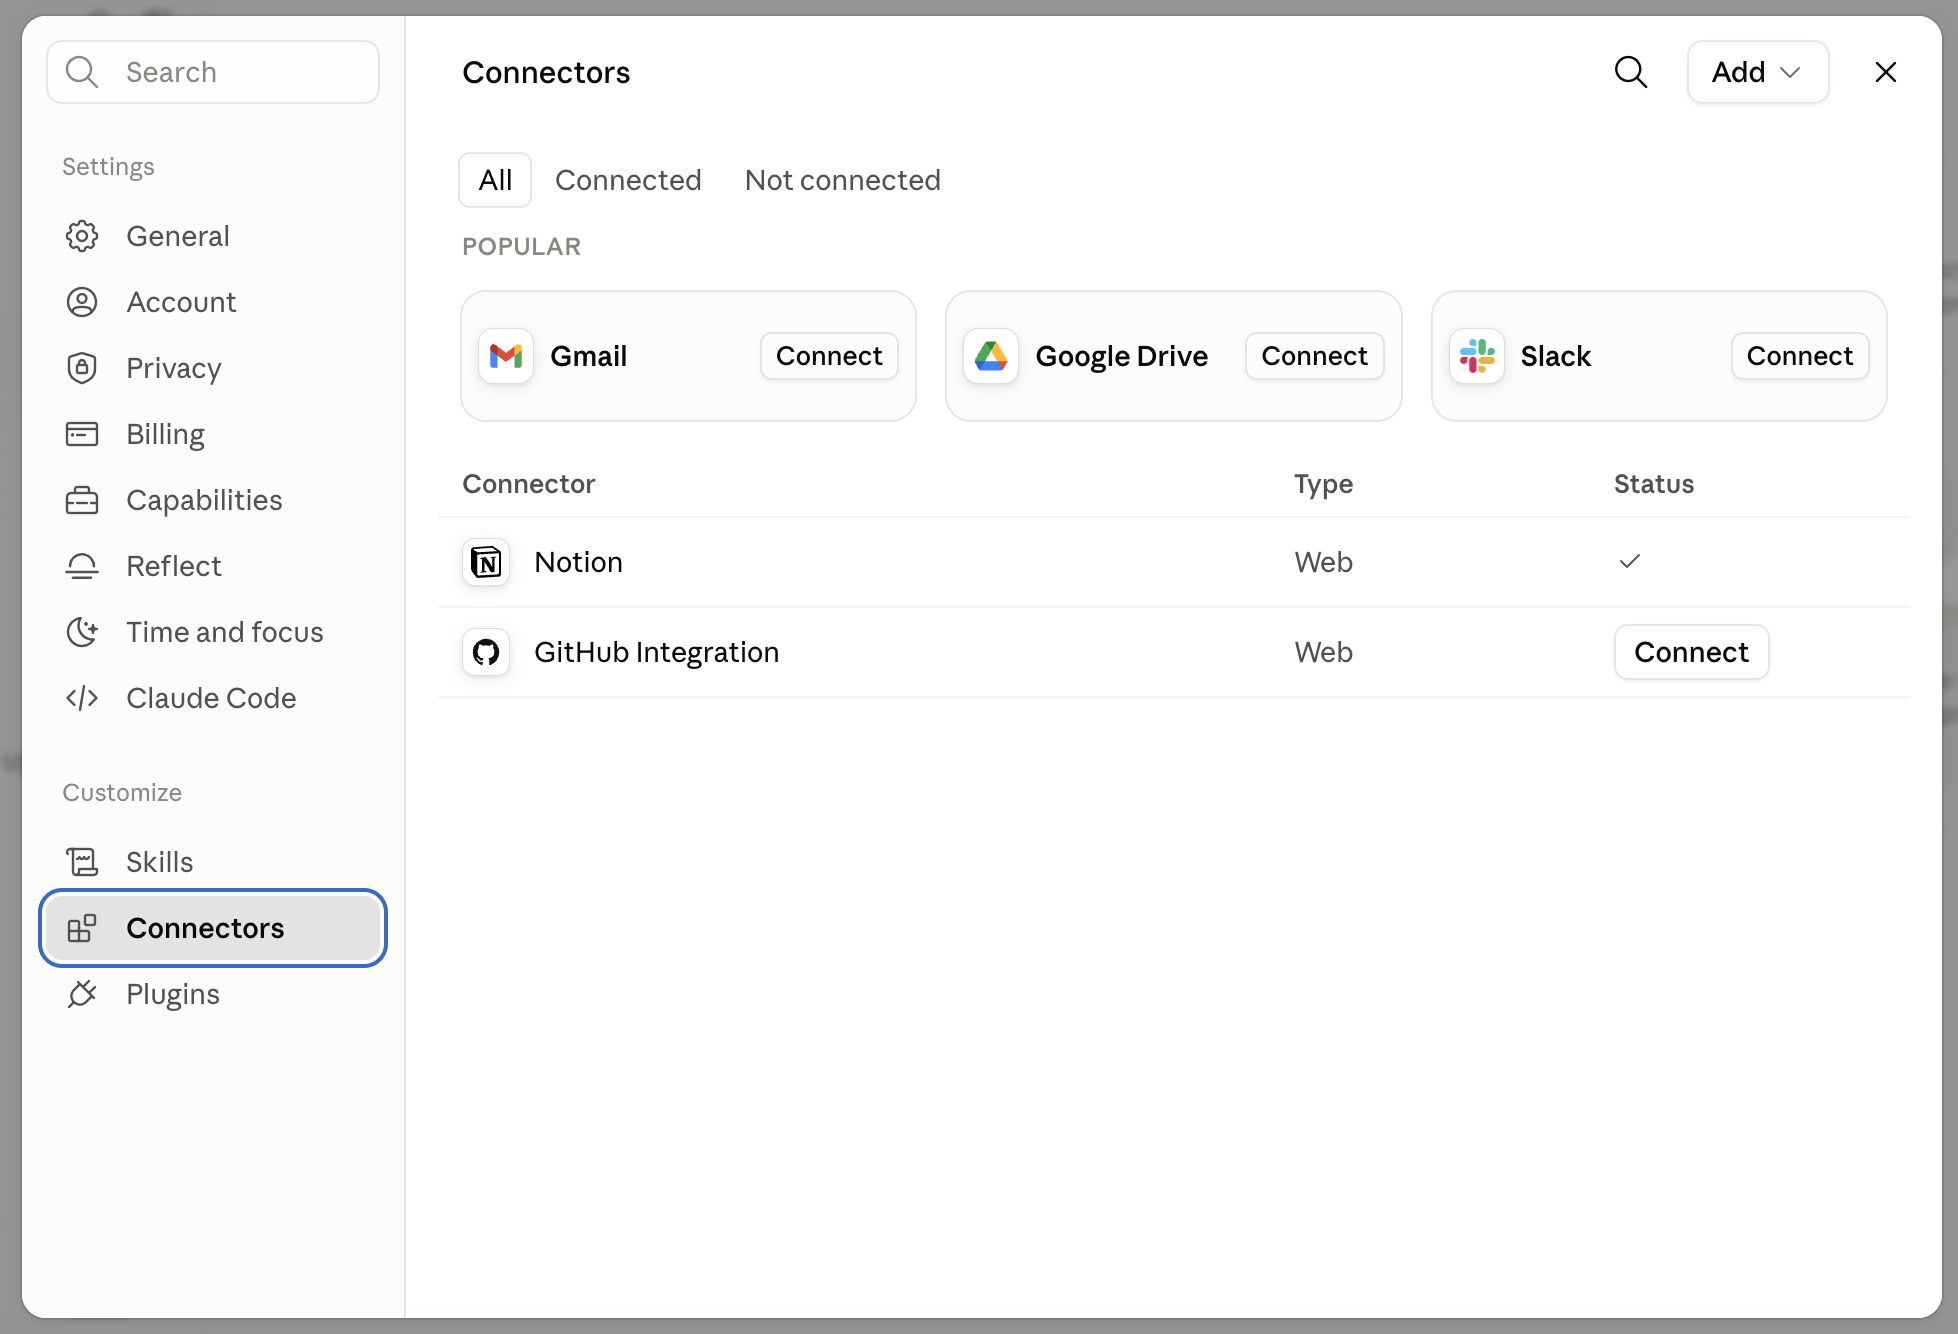
What you should see now
Notion ticked in your connectors, and nothing else to do here - you don't need to create any pages. Claude builds its own memory pages in your Notion during the first conversation, which is the next guide.
If you want a comfort check first, ask Claude in your project:
Are you connected to my Notion?
One thing to know for later: permission cards
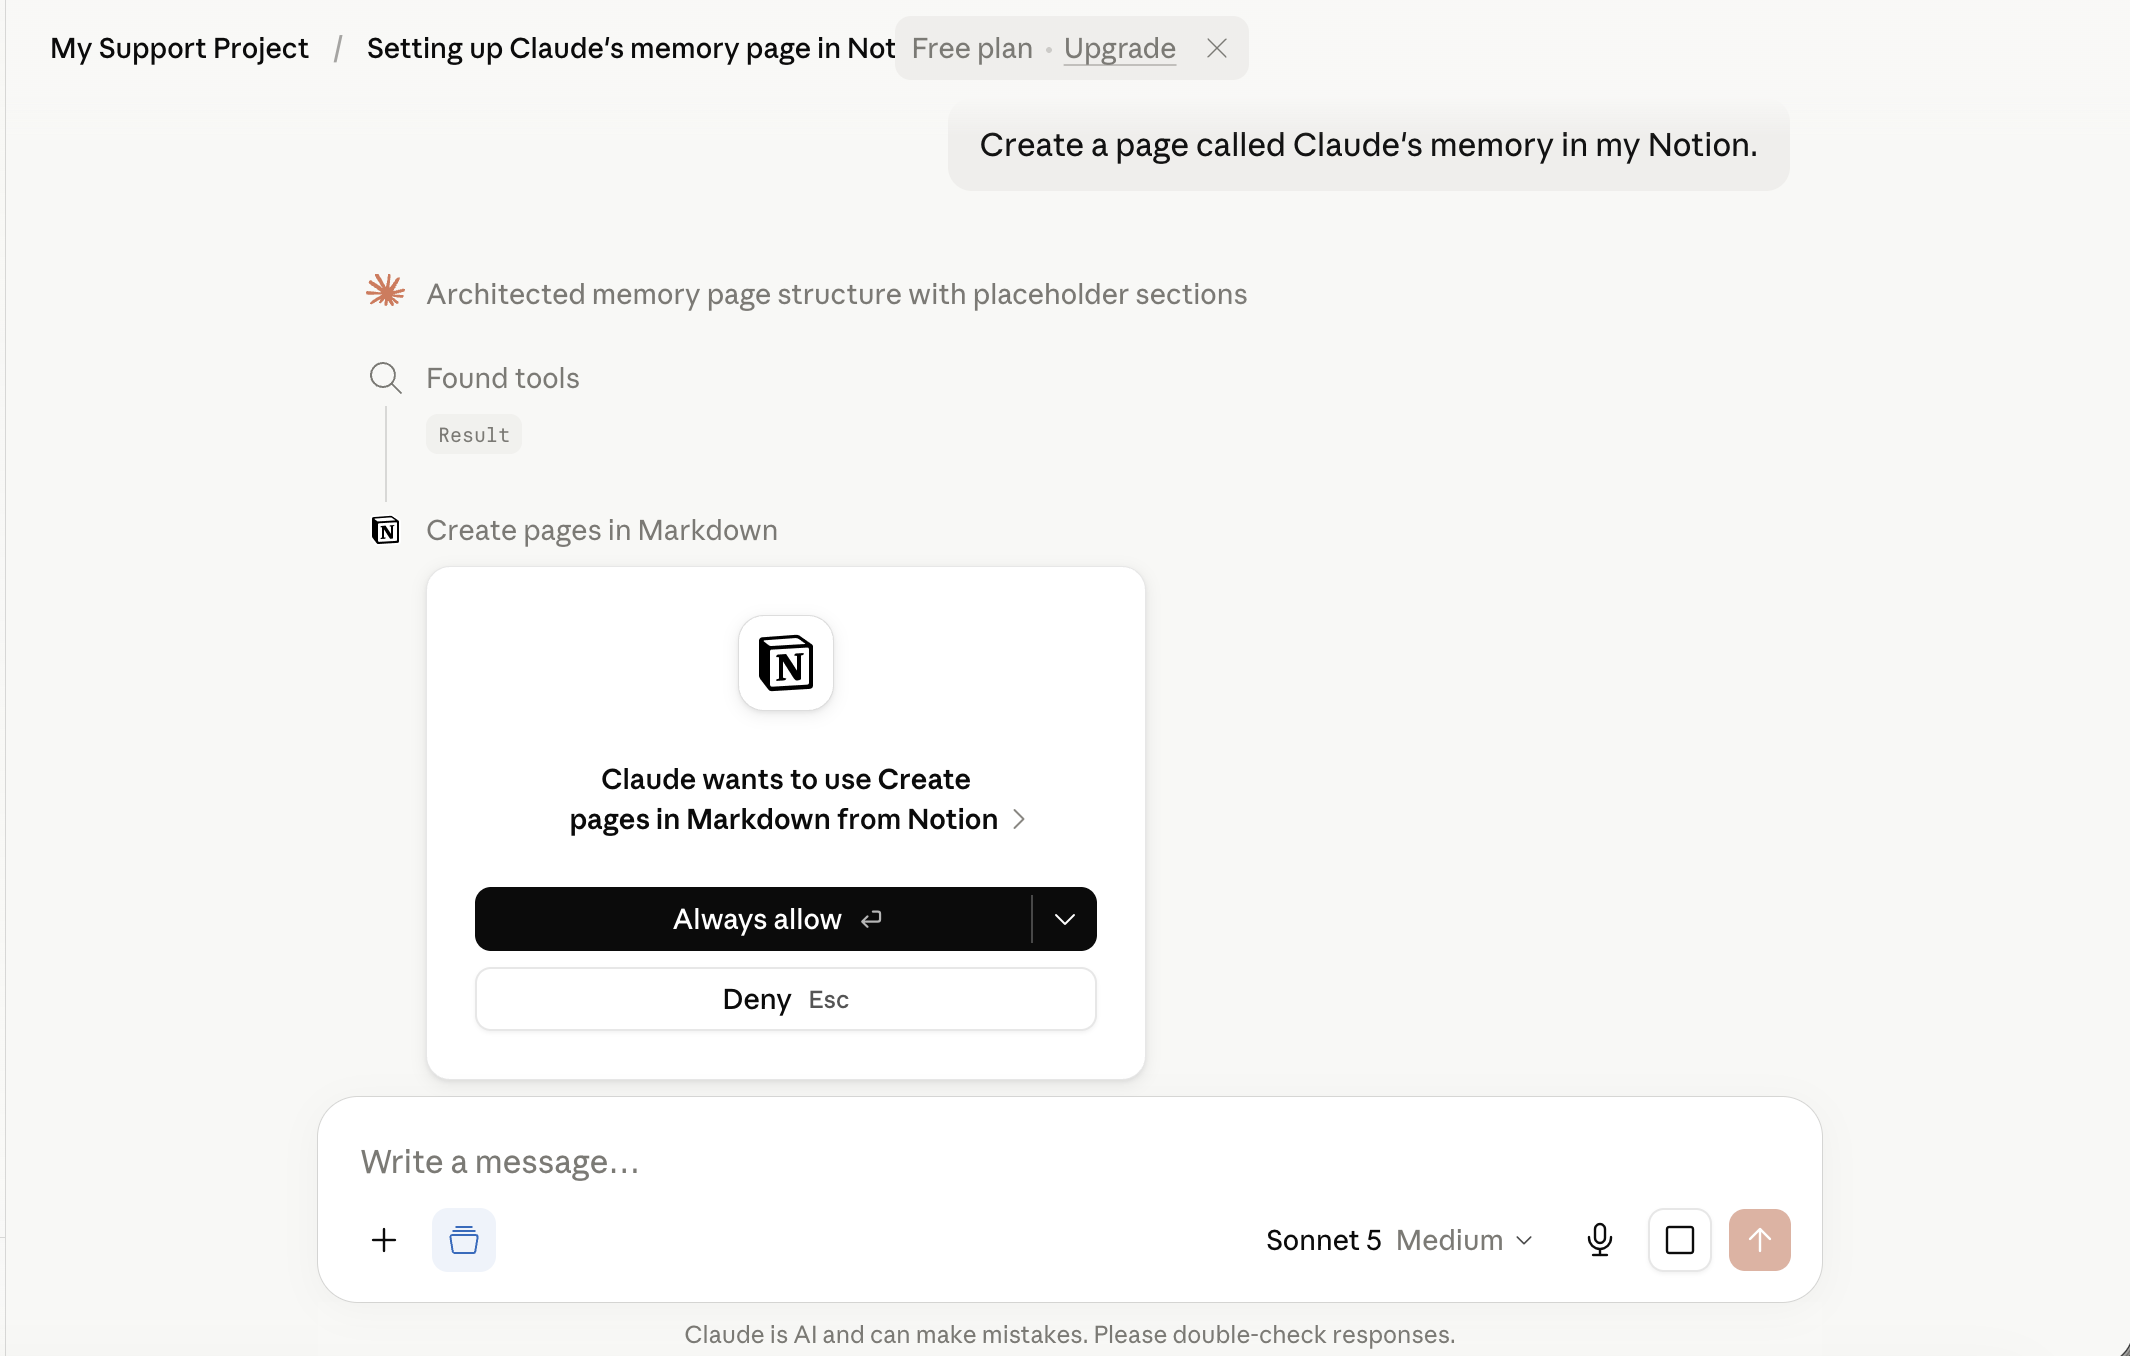
The first time Claude uses each of its Notion abilities - creating a page, updating one, searching - a card appears in the chat: "Claude wants to use [ability] from Notion," with Always allow and Deny.
Choose Always allow, every time one appears. There are a few of them (one per ability) and then they stop. This matters more than it looks: the whole kit is built on Claude quietly keeping its pages up to date while you talk, and that only works if it isn't stopped to ask permission for every save.
If something's off
- Claude says it can't reach Notion - disconnect and reconnect in Settings → Connectors, then ask again. If it asks you to log in to Notion again at some point in the future, that's the connection needing a refresh - reconnecting is always the fix.
- You have more than one Notion workspace - the approval screen has a workspace selector; the connection is to the workspace you chose there. If Claude seems to be looking in the wrong place, that's usually why.
- Worried about what Claude can access? The approval screen states it in Notion's words: it respects your page and database permissions and acts based on your access level. Everything it writes is in plain view in your Notion. And the second-account option above exists precisely for anyone who wants the harder boundary.